Monitor/Operating needle valves
From Nuclear Physics Group Documentation Pages
Jump to navigationJump to searchThis can currently be found under 'Cooling the LHe Evaporation Fridge' that starts on Page 9 of the Cool-Down Procedures document found at https://docs.google.com/document/d/1ecbCTTtgoKBhofpUS1OsZVxOxAfA9XxAiUHVvF13A3o/edit#heading=h.73vjq4h5u8w0
- Over-pressure the fridge separator line to no more than 5 psi using the empty ball valve on the separator line tee. This over-pressures the separator. Make sure the that the bypass and heat exchanger lines are still closed.
- We don’t currently see an advantage of which stinger side of the fridge transfer line to go in first, the fridge-side or magnet stick. Make sure to note how it’s done, and put together any lessons learned. Make sure that the the extension line is not on the magnet-side stinger. This gives us a ~5” safety buffer between the bottom of the fully-inserted stinger and the top of the magnet.
- Fill the Magnet space. Verify via thermometry and liquid level probe. Follow Magnet refills. The next step (evacuating fridge space) can be done simultaneously with the Transferring Liquid Helium procedure to save time.
- Making sure the heat exchanger and bypass valves are open, turn on and open the separator pump fully. Monitor the pressure to make sure that there is a vacuum in the separator line until the separator is cold. Once the separator is at 4K, the separator pump should remain on at all times. Separator flow should be at <40 SLM in a steady state.
- Once the blue AMI dewar is filled and has reached a steady state, open wide the heat exchanger and bypass valves.
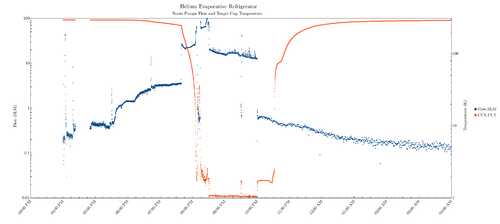
- Turn on the roots backing pump and make sure the roots are off. Ensure proper valving during this process to make sure that the fridge space is always being evacuated, and that we don’t draw oil through any of the pumps through accidental back-flow. When cooling down the ‘60s fridge, we had our best run while there was always vacuum pulling in the main fridge space. This might be different here, since gravity will be on our side when it wasn’t before. The vacuum should draw the liquid helium into the fridge space. Keep a close eye on the roots flow rate! See the diagram to the right for reference. The flow rate should start slow, ~1-2 SLM and slowly rise. Once liquid helium enters the fridge space, there will be a sharp rise in the flow rate to 20-50 SLM that will be accompanied by all the fridge thermometry dropping rapidly. Eventually the fridge will be cool enough to have LHe inside. At that point, the roots flow should stabilize and even fall a bit to a steady ~20 SLM.
- Achieve 4K in the nose, watching the thermometry to cover the target stick but not the target stick connector. See “Temp Map” on LabView for proper level.
- Once there’s liquid helium in the nose, valve off the separator flow to <40 SLPM. Make sure to monitor the flow rate constantly throughout the cool-down.
- Close the bypass valve.
- If not already on, turn on the roots pumps.
- Keep an eye on the nose LHe level via thermometry. If it becomes flooded (see “Temp Map” in LabView for proper height), close the heat exchanger valve until level drops.
- When there's a reasonable amount of liquid in the nose, open the heat exchanger valve very slightly, just a crack. Keep a close eye on flow rates to ensure a steady state.
- Achieve 1 K in the nose.
