Kvm
KVM is a Linux-based full virtualization tool which utilizes the virutalization extensions available with several models of Intel and AMD processors.
Installation
Prerequisites
KVM will only work on systems with processors offer virtualization support. To find out if a system's processor supports virtualization you can look in /proc/cpuinfo for the vmx (Intel) or svm (AMD) flags. This command should do the trick:
egrep '(vmx|svm)' --color=always /proc/cpuinfo
NPG Systems With Virtualization Support
Installing the Software
If you're using a RHEL system you need to enable the virtualization add-on entitlement to your RHEL license. You can install the packages via yum. This is the list of packages you will need:
libvirt-python
kvm
virt-manager
libvirt
kvm-qemu-img
kmod-kvm
kvm-tools
python-virtinst
Configuration
Start the libvirtd service, and configure it to start at boot.
chkconfig --level 345 libvirtd on
service libvirtd start
Network Bridging
KVM requires bridged networks to be configured manually. The configuration for RHEL 5 systems should look something like this:
/etc/sysconfig/network-scripts/ifcfg-eth0
DEVICE=eth0
ONBOOT=yes
HWADDR=FF:FF:FF:FF:FF:FF
BRIDGE=br0
/etc/sysconfig/network-scripts/ifcfg-br0
ONBOOT=yes
TYPE=Bridge
DEVICE=br0
BOOTPROTO=static
IPADDR=10.0.0.2
NETMASK=255.0.0.0
NM_CONTROLLED=no
DELAY=0
Also, the system firewall should contain a rule that forwards traffic to the bridged interfaces. This will require virtual systems to maintain their own firewalls because it won't be filtered by the host:
-I FORWARD -m physdev --physdev-is-bridge -j ACCEPT
Managing Virtual Machines
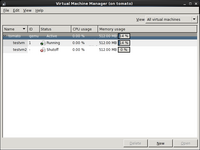
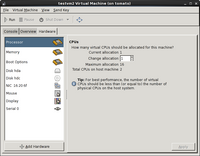
The virt-manager utility can be used to add and remove virtual machines, start and stop VMs, view virtual machine details, add and remove virtual hardware, and access the system console.
The virt-manager tool provides a GUI for creating and managing VMs. It's fairly simple and straightforward to use. There are also command line tools.
KVM Command Reference
Creating a new VM
Before creating a VM you need to create a new virtual disk. Use the qemu-img command to specify the image type, file name and size. The typical file type for a kvm system is in the qcow2 format.
qemu-img create -f qcow2 testvm.img 10G
To install a new VM from the command line use the virt-install command. There are a lot of different options that can be given to this command. It's a good idea to review the manual if you plan on creating a new VM this way. There's a really useful detailed list of options at [this website].
Here's one example:
virt-install -v --name=newvm -r 512 --os-type=linux --os-variant=rhel5 --cdrom=/path/to/rhel5-install-DVD.iso --disk path=/kvm/newvm.img,size=10 --network=bridge:br0 --network=bridge:br1 --vnc --vncport=5904
The options are specified in such a way that they should be easy to figure out. This command generates RHEL 5 guest using full virtualization (-v) with the name "testvm". The system will have 512 MB of memory, one CPU, a DVD .iso image as a cd-rom drive, and two NICs which utilize bridge interfaces (one for the farm and one for the UNH network, in this case). The system console will also be accessible via a VNC connection over port 5904 on the host system.
If a disk image already exists, simply use the --disk path=/path/to/disk.img option. If the path points to a nonexistent file a new image will be created. If you want to create a new image in this way make sure to add the size option (in Gigabytes). This will create a dynamically expanding virtual disk of that size.
If the command is successful the new virtual system will be created and the console will be opened with the virt-view command.


