Difference between revisions of "VMware vSphere Hypervisor"
| Line 16: | Line 16: | ||
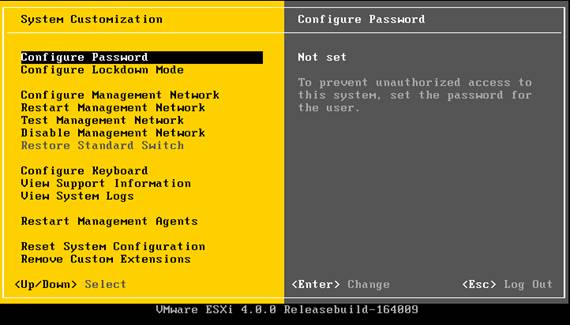
Once the install is finished you're presented with a simple text-based interface called the Direct Console User Interface (dcui). here's what it looks like: | Once the install is finished you're presented with a simple text-based interface called the Direct Console User Interface (dcui). here's what it looks like: | ||
| − | [[Image:dcui.jpg | + | [[Image:dcui.jpg]] |
All that you really need to do from this interface is to set the system's root password and configure the Management Network. | All that you really need to do from this interface is to set the system's root password and configure the Management Network. | ||
Revision as of 21:19, 12 May 2011
VMware vSphere Hypervisor is VMware's freely available bare metal hypervisor. It may offer a potential replacement for our existing virtualization solution. VMWare offers a free license for vSphere Hypervisor that allows users unlimited use of the basic virtualization features but limits some of the nicer features of VMware like hot-adding hardware to virtual systems, VMotion, and managing virtual machines via a command line interface. The current test setup is using a free license associated with my own account, but a shared vmware account for npg admins will probably be needed in the future to allow each of us access to the web interface at [go.vmware.com go.vmware.com] which offers some useful tools for managing VMware infrastructure.
Current Status
Pepper is currently acting as our test bed for vSphere Hypervisor. Tomato may become a second test bed if it is needed.
Installation
Installing vSphere Hypervisor is a fairly straightforward process.
First, you need download the ISO image of the vSphere Hypervisor installer from the VMware downloads website. You need an account to access these downloads. Burn this ISO to a disk and boot the system from it.
The actual VMWare installer is very straightforward. It will ask you to accept the license agreement, and whether you want to install or upgrade. After that you select a disk onto which you want to install the hypervisor, and the installer will do the rest of the work.
Once the install is finished you're presented with a simple text-based interface called the Direct Console User Interface (dcui). here's what it looks like:
All that you really need to do from this interface is to set the system's root password and configure the Management Network.
