Difference between revisions of "Mail Clients"
| Line 18: | Line 18: | ||
<br/> | <br/> | ||
[[Image:AppleMail-3.png]] | [[Image:AppleMail-3.png]] | ||
| + | <br/> | ||
| + | <br/> | ||
| + | A certificate warning will appear. Select 'Show Certificate' and check off the 'Always trust' option. You may be prompted for your password to save changes. | ||
| + | <br/> | ||
| + | <br/> | ||
| + | [[Image:AppleMail-cert.png]] | ||
<br/> | <br/> | ||
<br/> | <br/> | ||
Revision as of 13:09, 17 December 2013
This page details steps for setting up common e-mail clients to access accounts on our mail server.
Apple Mail (Mavericks)
Open up Mail and press the 'Command' + ',' keys on your keyboard (the command key will be the Windows key if you are using a PC keyboard). This will bring up your Apple Mail preferences. Select the 'Accounts' tab and then the '+' symbol at the bottom left of the window. Select the 'Add Other Mail Account...' as shown in the following screenshot.

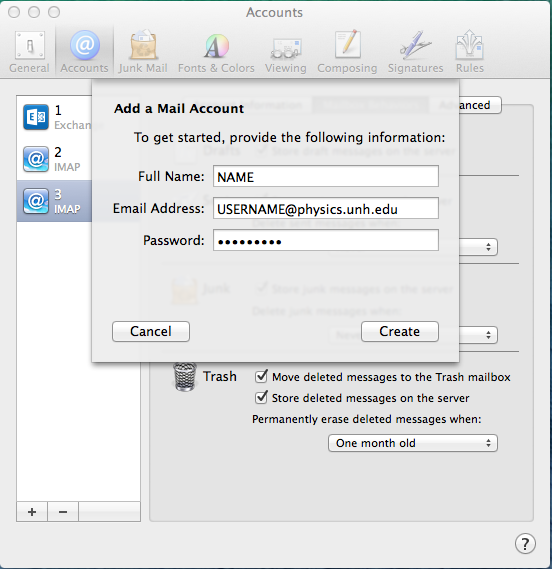
Enter your name, NPG email (your_username@physics.unh.edu), and NPG password. Press 'Create' to continue. Mail will attempt to figure out the settings necessary to connect and fail. When this happens it will ask you to configure your account manually. Go ahead and press 'Next' at this point.
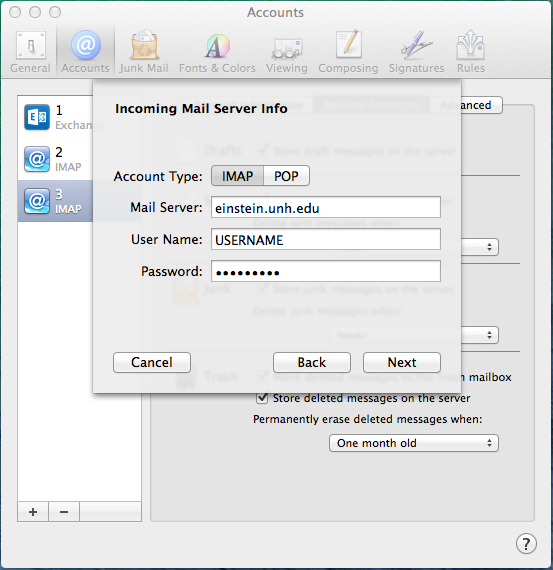
Select the Account Type as 'IMAP'. Set the Mail Server option as 'einstein.unh.edu'. Input your NPG username and password and press next.
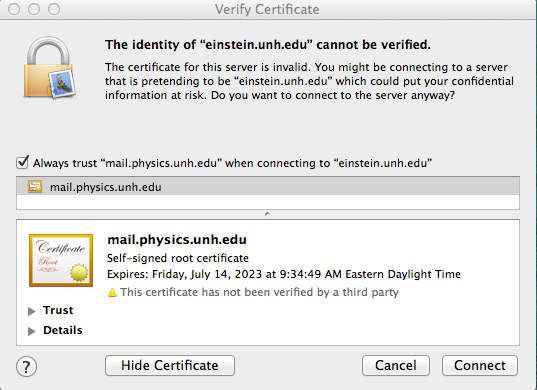
A certificate warning will appear. Select 'Show Certificate' and check off the 'Always trust' option. You may be prompted for your password to save changes.
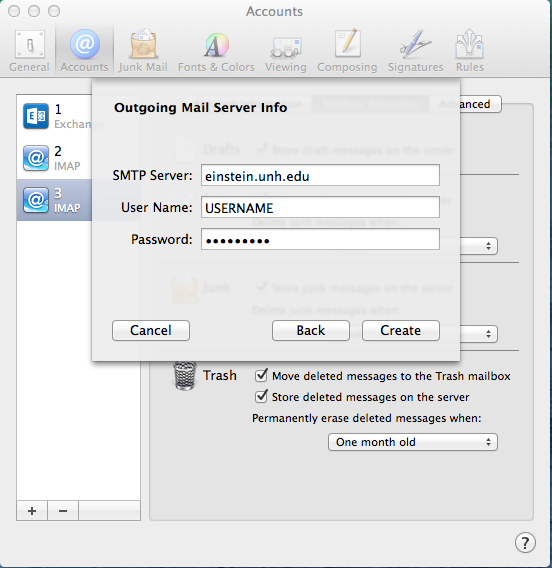
Set the SMTP Server option as 'einstein.unh.edu', and again enter your NPG username and password. Press 'Create' to complete the process.
Thunderbird
If it is your first time running Thunderbird, you will be prompted to setup a new account. It should look like this:
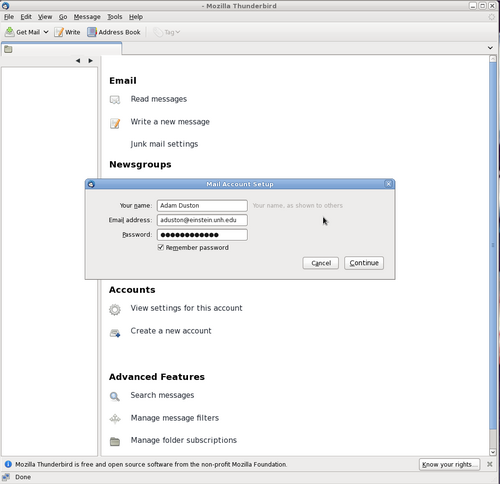
Enter your name, e-mail address and the password for your e-mail account. You may be prompted with the following security warning:
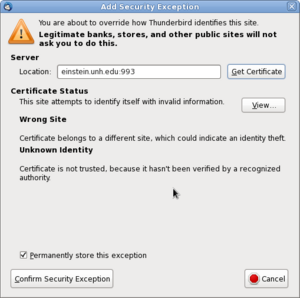
This is normal, just click Confirm Security Exception. Next you will be presented with the settings autogenerated by Thunderbird. You will need to make some minor changes to these settings. Click the "Edit" button on this screen:
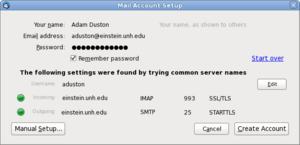
Set the outgoing port to 465 and the encryption settings next to SSL/TLS. It should look like this:
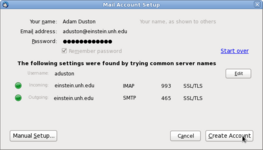
Once the changes are made click Re-test Configuration. You should now have green lights next to both incoming and outgoing server options. All you need to do now is click Create Account and you will be able to access your e-mail in Thunderbird.